Adding Sit-Ups Back Into Your Postpartum Workout

“When can I do ab workouts after having a baby?”
”When should I add sit-ups back into my workout after having a baby"?”

Sit-ups were traditionally thought of as the gold standard for abs. You want six-pack abs? Do sit-ups. You want a strong core and to decrease back pain? Sit-ups. But what if I told ya that sit ups aren’t the end all be all of core health? It’s true that sit-ups work the rectus abdominis, which is a core muscle. The thing is, it’s only one part of the core. Instead of declaring sit-ups worthless, let’s focus on WHEN and HOW to add them back into our postpartum workouts.

First, the when. I know it’s not a straight answer, but it depends. In general, I don’t recommend before 9 months to 1 year postpartum. But what happens after that first year of postpartum? There isn’t a magical timeline that makes one year the perfect time to add sit-ups back into the workout, but around the 9 month to one-year mark our tissues have healed and it’s a great time to test our new boundaries. We are each unique and for some you can perform a sit-up as early as 4 months, and for others it may be a better idea to wait for a year or longer. To me, the key is knowing that you can add sit-ups back into your workout (if you want to) and that we shouldn’t fear sit-ups, or any movement for that matter.

So how do we know it’s a good time to add in movements like sit-ups? Like all exercises, let's progress to a sit-up! There's a big difference between churning out 100 crunches and sit ups on an ab mat as fast as you can and doing a nice, slow and methodical sit-up. A slow and methodical sit-up will help you maintain your breath and stability throughout the entire system and also increase your strength!

When progressing to a sit-up, ask yourself these questions:

  1. Can I perform a deadbug moving both arms and legs without tenting, coning or increased pressure or heaviness on my pelvic floor? 

    1. If not, let’s stick to the deadbug for a little while longer and focus on breathing into all 360 degrees of the core (lower ribs, pelvic floor, back and belly).

    2. If you can perform a deadbug without compensation, move on to step 2.

  2. Can I maintain tension in my abdomen when I do a neck curl or curl up? 

    1. If not, let’s work on the deadbug a little longer and focus on breathing and adding in a neck curl or curl up. The key here is to not lead with your neck, you want this to be a global movement rather than a pecking chicken.

    2. If you can perform a neck curl and maintain tension in the abdomen, move on to step 3.

  3. Can I breathe in and maintain tension throughout my core and maintain a neutral spine while I sit up?

    1. If you can do a sit-up without driving your low back into extreme extension (pushing your low back into the ground) and using your low back and momentum to complete the sit-up, go get it!

    2. If you can do a sit-up without jutting your neck and chin like a chicken to get momentum, go get it!

    3. If you do a sit-up and you feel your neck, quads or low back are taking the load, back off a little bit and focus on breathing, the deadbug and slowly train up to a sit-up by doing the exercises below.

    4. If you do a sit-up and you feel 4-10/10 pain in your abdomen, or pressure and heaviness in your pelvic floor, then peel back to step 2 and work on the exercises below.

When training a sit-up we can also focus on the individual components of a sit-up to better train the overall  movements of a sit-up.

  1. Eccentric loads: Start at the top and slowly descend to the ground. Similar to segmental cat cow, you will feel a global extension of the low back as you slowly and segmentally bring your body towards the ground. If you feel like your back dips or peaks in one location, you may be putting more force and pressure in that location. Try to lengthen the spine (like you are laffy taffy and pulling the neck and butt apart) and keep all parts of your back moving.

  2. Isometric load at the top: Start at the top of a sit-up and slowly lean back. When you are starting out, you will be more vertical and as you gain strength and control you can start to lower yourself towards the ground more. Hold this position for 2 breath cycles. This will help you build strength and endurance (ideally confidence as well!).

  3. Isometric load at the bottom: Start at the bottom of the sit-up and do a slight curl-up. Keep your chin tucked and neck extended, trying to not jut the chin out and doing a curl-up with only your neck. This will be a global flexion movement through your upper abdominals and upper to mid-back. 

*During these movements you can add a little bit of dorsiflexion to the foot (bring your foot towards your face) and push against the heel to help keep the pelvic floor activated.

I would love for y’all to not FEAR sit-ups, instead the next time your class has sit-ups listed as part of the exercise you feel excited, comfortable and confident. Even if you’re not ready for the full sit-up just yet, you know the progression to build up to a sit-up! You may even realize that doing 5-10 slow and controlled sit-ups are way harder of an ab exercise than the 100 sit-ups you did before having a baby.

XOXO,

Dr. Lauren

Preparing your Pelvic Floor for Labor Through Movement

Congratulations, you found out you are pregnant and are now planning all of the things - what will the baby’s room look like, what’s the best carseat, bottle, carrier, etc. You’ve probably planned it all...but have you thought about what positions you want to move in while in labor? We’ve all seen the TV show and movie where a woman is on her back, feet up in stirrups (the lithotomy position) and pushing as hard as she can, but did you know the position you give birth in can affect your rate of perineal trauma and tearing? In fact, giving birth in this position “may have been adopted to make it more convenient” for providers without looking at the effect it has on mothers. So let’s take a look at some of the common birthing positions that may be helpful for the mother during labor.

Walking, Standing and Leaning in Labor

Upright positions, whether it is walking, standing or leaning have been shown to decrease the second stage of labor or the pushing stage. The upright position has also been associated with a reduction in assisted deliveries and episiotomies. This is important because a long second stage of labor and assisted deliveries have both been associated with greater risk of third and fourth degree perineal tears.

How to prepare during pregnancy: WALK! Spinning Babies recommends walking daily and building up to 3 miles a day at a pace where you can still hold a conversation. Don’t let that number scare you, if walking hasn’t really been your exercise of choice in the past, that’s ok. Smart small and work up to three miles!


Kneeling, or All-Fours (Hands-and-Knees) While in Labor

The all-fours position has been associated with less pressure on the perineum (cough, cough, that means less likely to produce tearing, avulsions and prolapse), and gives the provider a good visualization of what’s happening. (1) An added bonus is that it has significantly higher rates of intact perineums, first-degree tears (lower rates of 2nd, 3rd and 4th degree tears) and lower rates of episiotomy. 

How to prepare during pregnancy: There are a few positions that are great that mimic this. First, just breathing in quadruped (all-fours), you can also do bird dogs, lunges, quadruped with your arms resting on an exercise ball and tripod movements. All of these will help you build strength and endurance in your arms and can help you feel more confident while in labor.


Sitting and Squatting While in Labor

If you’ve taken a childbirth education course, you’ve probably learned about how the toilet can be your best friend in labor. Not just because you have diarrhea (which fyi, is pretty common in early labor) or because emptying your bladder gives more room for the baby to descend (it does, so make sure you use the loo while in labor), but because the position helps open up the pelvic floor muscles to allow the baby to descend if (s)he is already engaged. In a relaxed position, the deep squat may decrease pain, labor time and decrease the need for cesarean by utilizing gravity to help the baby descend. One important thing to know is that squatting during the second stage of labor has been associated with increased risk of 2nd degree tears (and lower rates of 3rd and 4th degree tears) and blood loss. If squatting is your movement of choice, you can sit squat, use a squatting bar (available at some hospitals), utilize your partner to do a supported squat, or sit on a birthing stool. 

How to prepare during pregnancy: Squat. Squat to the pot, squat to pick your kid up, squat to do laundry, squat when you drop something on the floor, squat to your chair, squat, squat, and squat. Ina May recommends 300 squats a day but I understand that isn't possible for everyone. Instead, everytime you go to sit down practice your squats and if you have a little extra time, add 5-10 squats every time you sit down or stand up. When squatting, try to keep your toes straight or slightly turned inward to help open the pelvic floor and relax the booty. If you feel tension in your hips, doing a little squat therapy may help ease that tension.


Side-lying While in Labor

Lying on your left side has been shown to “reduce perineal trauma, avoid performing an episiotomy and achieve an intact perineum” even in first vaginal deliveries. (1) There are a couple of options to lying on your side- you can lie with a peanut ball or support between your knees, or you can put pillows under your feet to help your knees come together and your feet to go outward. This move actually opens the pelvic floor allowing more space in the pelvic outlet for the baby to descend and make its way to the outside. Many women note this position is beneficial because it allows her to labor in a more relaxed state and conserve energy in those marathon labors. 

How to prepare during pregnancy: Rest smart. This is another fabulous recommendation from Spinning Babies because how you rest matters too. Are you using your pregnancy pillow to basically practice your kung fu moves in your sleep? If so, changing up how your rest in a chair, car and even on a couch or bed can ease the tension on the ligaments in your belly. This can help with baby's position and help you mentally prepare for laboring in a relaxed position. So go ahead, use this as an excuse to take a 20 minute nap and practice your labor position.


Moving in Labor with an Epidural

An epidural can take out some of these movements (like walking) but with a few modifications, even a mama with an epidural can benefit from different laboring positions. One thing to note is the strength of your epidural. If your epidural is strong, you may want to ask your provider to turn it down so you can have more control over the position you are in.  

One movement you can do with an epidural during labor is lying on your left side. The amazing Penny Simkin came up with the Roll-over Technique  which helps the mama and baby get into a better position to labor. If you can still move with an epidural, it's possible that with a little help you could get into throne's position, supported squat or  even to a birthing stool. For some mamas, if the epidural is light enough they are able to get on hands-and-knees to birth the baby. More often than not, you can also utilize the peanut ball to help open the pelvic floor.

How to prepare during pregnancy: When was the last time you just sat and were present in your body? Maybe you like to multi-task or avoid checking in with how you are feeling. If that sounds like you, practice sitting or lying on your side. Notice how you feel, if you have any aches or pains, notice your breathing. Preparing for this one by preparing the two things you have more control over in labor: your breath and your mindset. 

What If I Labor on My Back?

Whether you have an epidural or not, if you find yourself laboring on your back there are small things you can do to help relieve pressure/tension on your pelvic floor.

  1. Place towel rolls under your ischial tuberosities (the bony parts under your butt) or off the sides of your sacrum. This will allow better posterior sacral movement during delivery and can relieve pressure on the pubic symphysis.

  2. Place a small pillow under your low back to help keep your back in extension and open the pelvic floor.

  3. You can limit the lithotomy position (think knees to your chest) by pushing with your feet still flat on the table. This is especially helpful if you are experiencing lightning crotch during pregnancy or delivery.

Are These Positions Safe for Mama and Baby?

In comparison to lying on your back, all of these upright positions have been shown to have fewer abnormal fetal heart rate patterns and no clear difference in admittance of babies into the NICU. That means that in general laboring and giving birth in one of these positions is equally safe for the baby as the mama on her back. It may even be more beneficial for the mother to reduce the risk of perineal tears and prolapse to give birth in an alternative position. One thing that can help is to try to move frequently, every 30ish minutes during labor to help the baby descend. 

If you are wondering what the best position to give birth in, it’s the one that your body chooses. Sometimes our minds and our bodies try to compete because we think we “should” labor in one position. Listen to your body, trust your body and most importantly, trust that your mama instinct is already on point. 


References:

  1. https://www.ncbi.nlm.nih.gov/pmc/articles/PMC6511367/#ref14

  2. DOI: 10.1002/14651858.CD002006.pub4.

Recovering from a Perineal Tear Immediately Postpartum and Long Term 

First off, I’m sorry you’re reading this because it probably means you did a google search in the middle of the night trying to come to terms with what has happened to your body. I first want to send you a virtual hug and let you know that you are not alone. Caring for a newborn is a lot of hard work and recovering from a perineal tear makes it harder. You are also stronger than you know and you've got this.

Recovering from a perineal tear can vary from person to person and changes through time but there are a few things that most everyone can benefit from whether you just tore or are well on your way to recovery.

Risk Factors for perineal trauma_-3.png

Recovering from Perineal Tear in Early Postpartum

In the immediate postpartum, mamas normally notice pain. Pain with walking, sitting, getting up out of bed, peeing (oh the sting or burn), and while holding their child. The visible portion of the perineum usually heals within the first few weeks and after that the pain and soreness tends to improve within 2-3 weeks. Meanwhile, in those first few weeks there are things you can do to help ease recovery.

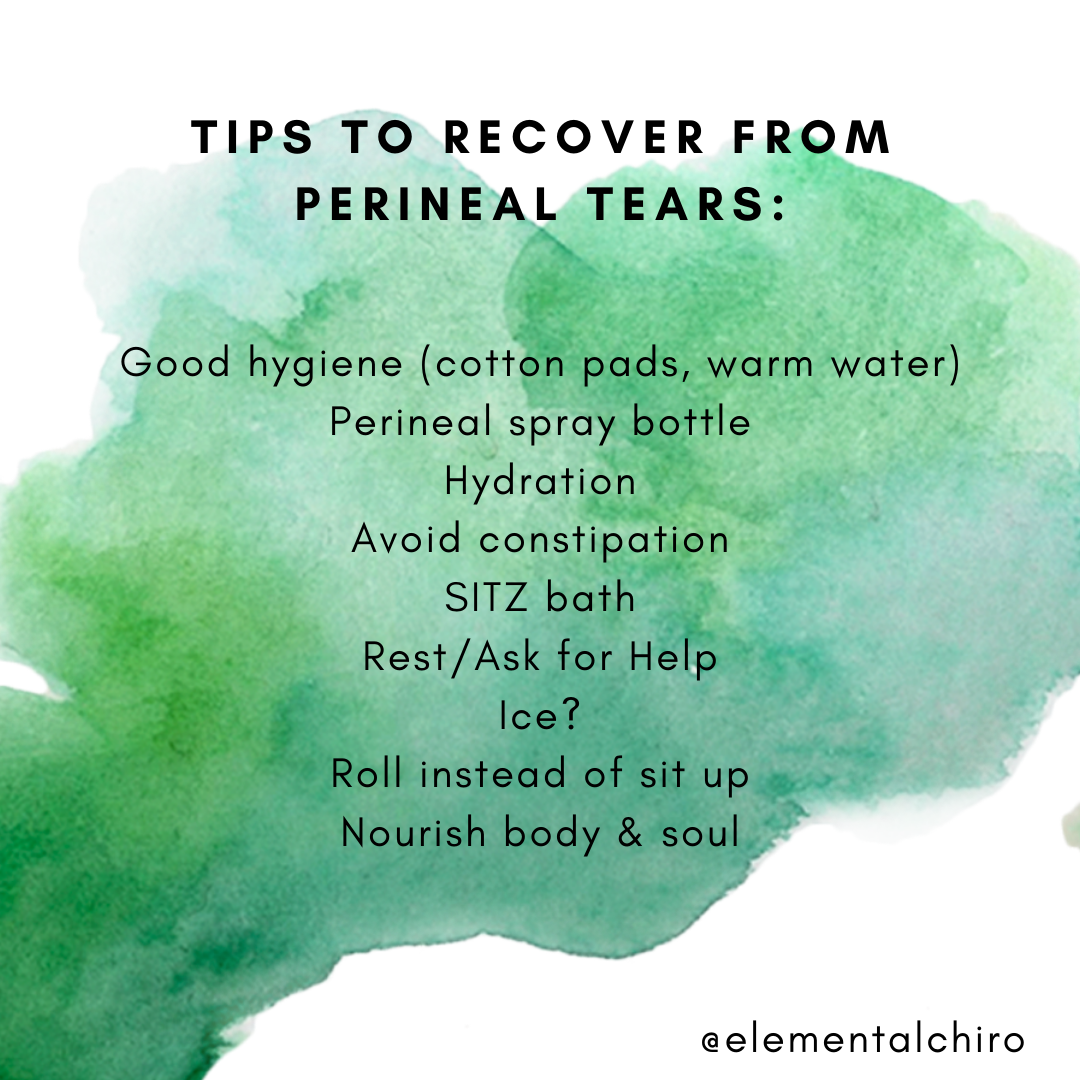
  • Good hygiene: Keep the perineum clean by using warm water, washing your hands before and after using the restroom and changing your sanitary pad or depends regularly.

    • Side note on pads: I highly recommend you invest in either cloth pads or organic pads in those early days. Many find the plastic portion of the pads actually causes additional swelling, redness and irritation or causes chafing so go ahead and buy the good stuff like Sustain, Seventh Generation, or L brand.

    • Side note on water: your vagina is a self-cleaning oven and does not require special sprays or disinfectants to clean it postpartum. Unless you have an infection, warm water is all you need or want to put on the vagina.

  • Perineal bottle: The upside down perineal spray bottle is nothing short of amazing and may be your best friend in those early. Keeping the spray bottle by the toilet and using warm water on your perineum while you use the restroom (both pee or poop) can help ease the stinging or burning sensation many women feel.

  • Hydration: This is one of those win-lose situations we all “love”. Yes, staying hydrated will make you need to pee more frequently (use the perineal body) but tissues that are hydrated also heal faster so it is important to make sure you are staying hydrated after a perineal tear.

  • Diet/Bowel Health: These go hand-and-hand because one of the best things to do is avoid constipation and this is done by eating high-fiber foods. Additionally, try to sit up tall on the toilet, use a squatty potty or something to prop up your legs, don’t rush and breathe your bowel movement out rather than push. T

    • As far as foods go the following is a list of fiber packed foods that may help you limit or avoid constipation as long as you are well hydrated: black beans, apples, pears, spinach, lentils, almonds, broccoli, chia seeds, bananas, Brussels sprouts, berries (blackberries, strawberries, blueberries), avocado...mostly eat fruits and vegetables with the peel on alongside good fats and healthy protein.

  • SITZ bath: Double check with your provider to make sure there are no contraindications, but a sitz bath is when you fill the tub with a small amount of water and soak in it with epsom salt and herbs. It’s generally recommended to soak for 10-15 minutes to soothe postpartum discomfort (and relieve good ole hemorrhoids as well).

  • Rest/Ask for Help: Oh Mama, I know it’s hard to ask for help. In a world full of go-go-go it’s hard to slow down. Trust me, I get it (oh, do I understand all too well). Trust me when I saw, one of the best things you can do for both you and your sweet babe is to get quality rest. Ask friends or family to help cook meals, do a load of laundry, load the dishwasher, change the babe, rock the babe so you can sleep. Whatever you feel comfortable asking, ask. Our bodies need sleep in order to heal so taking the time to rest now will help your body heal faster.

  • Ice?: Yeah, I included a question mark. There is a ton of mixed research on this one. I believe in informed consent and like everything there are risks and benefits to ice and only you can decide what is best for you at this time. The benefit is that using ice on the perineum (with a towel in between, not directly on it) is a good way to reduce pain in the early days when it hurts to function. The risk is that some studies have shown that ice may make the tissues take longer to heal. If you decide to use ice, you can make a homemade padsicle by using the cotton pads you bought and adding witch hazel to the pad and putting it in the freezer to use when needed.

  • Roll: Now is not the time to get on the floor and practice rolling, but it is a perfect time to focus on rolling out of bed instead of doing a modified sit-up to get out of bed. This will decrease the tension and pressure on your pelvic floor so it is ideally not as painful to get in and out of bed.

What to Look Out for with Perineal Tears 

If you have ANY concerns about what is happening to your body or your pelvic floor, please contact your provider now. You hired them and they are there to help you. Here are a few things to look out for that are also important to contact your provider if you experience:

  • Painful stitches

  • Odor

  • Redness or swollen skin

  • Discharge or pus

  • Increase in pain or tenderness

  • Stitches that are taking longer to heal than you expected

  • Fever

  • Difficulty controlling urine or bowels (you are leaking gas, stool or pee) 

Recovering from Perineal Tearing Long Term

There are two things I recommend for long-term perineal tear healing:  pelvic floor rehab and to nourish the body through nutrition. 

The number one thing I recommend for recovering long-term from a perineal tear is to see a pelvic floor rehab specialist. Depending on the circumstances, it can take time to heal but a pelvic floor provider can assess your specific needs. Your perineal tear may result in a hypertonic pelvic floor or muscles that are constantly tight while someone else and you need stretching and lengthening while someone else needs strengthening and tightening of the pelvic floor or balance and coordination. There are too many variables to say that all perineal tears require xyz treatment to improve so you deserve to know what your body needs.

Postpartum can be a chaotic time with a ton of moving parts, but it is equally important to nourish mama postpartum as it was while pregnant.  A few little things you can add is daily bone broth or collagen to help support the tissue repair. Many women also notice a benefit with short-term use of 1,000-3,000mg of Vitamin C with bioflavanoids (but if you have loose stools it is too much). Vitamin C is a key co-factor for collagen and helps with tissue healing.

Mama, I just want to remind you that you’ve got this. That’s not to say that it is easy, but I hope you are able to ask for help, find support and are on the road to recovery so you can enjoy your little one without pain.


References 

  1. Thom DH, Rortveit G. Prevalence of postpartum urinary incontinence: a systematic review. Acta Obstet Gynecol Scand. 2010;89:1511–1522. doi: 10.3109/00016349.2010.526188.

Perineal Tearing in Labor - Part 2: What we know about why the perineum tears and how to modify risks

Risk Factors for perineal trauma_.png

Now that we know what a perineal tearing can look like, let’s dive a little deeper into the WHY they happen. Let’s be realistic, I don’t know anyone that wants a perineal tear and often times it’s presented as a doom and gloom situation. So we’re going to look at two things - first, what may increase our risk to have a tear and then what we can do to minimize that risk!

What do we know about why perineal tears happen? 

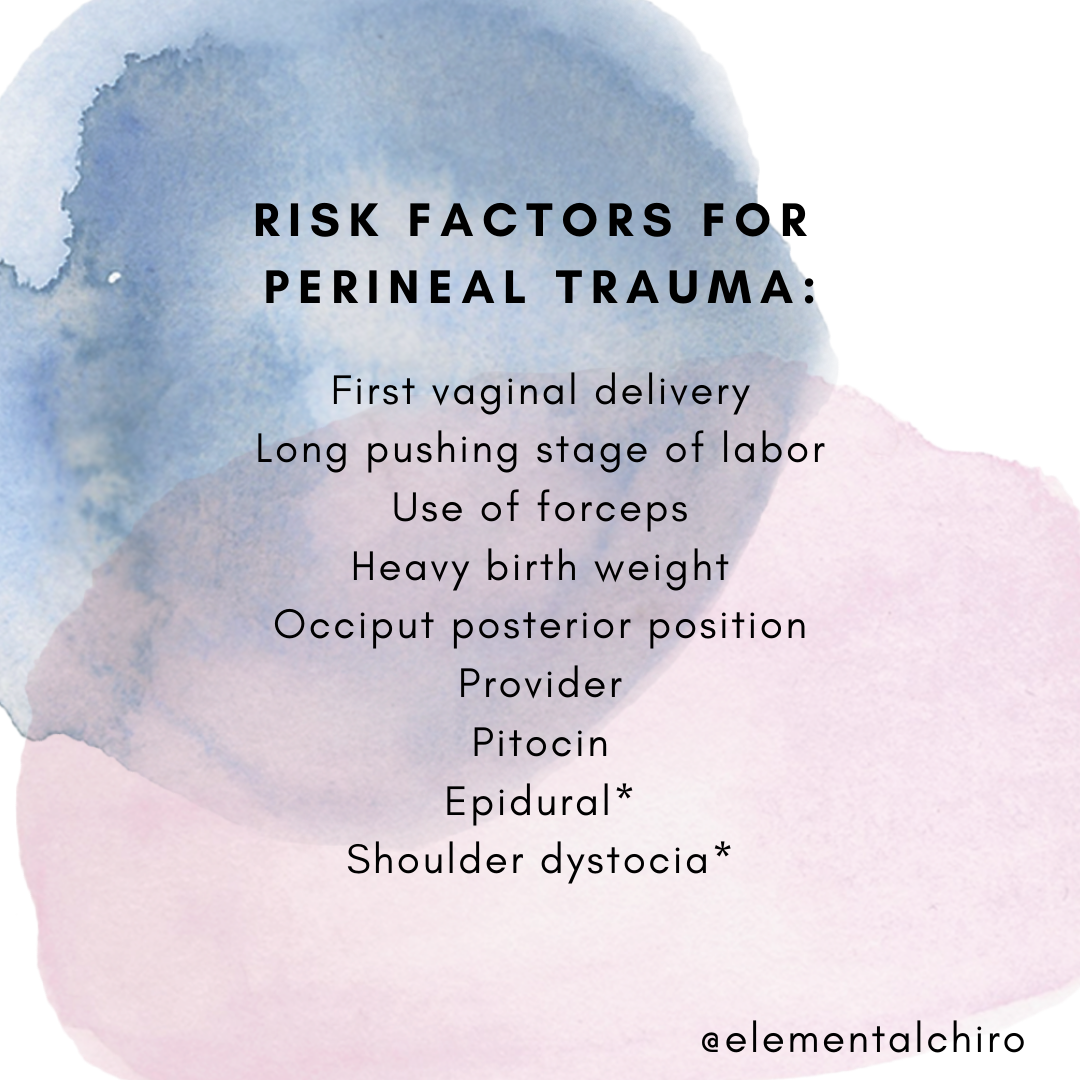
Perineal tearing or lacerations occur as the perineum and the rest of the vulva stretch to allow for the passage of the baby’s head through the vagina. Here’s what we currently know that can increase the likelihood we tear in birth:

  • First vaginal delivery - people who are having their first vaginal delivery are more likely to tear than if they have previously had a child vaginally. This is also an important note because research has shown that just because a mama tore during an earlier pregnancy does not mean she will tear this time or have the same severity...in fact 95% of mamas with a previous severe tear will not have another.

  • Long 2nd Stage of Labor - The second stage of labor is often called the pushing phase when the cervix is fully dilated and ends when the baby has arrived. If you find yourself pushing for 2+ hours, this may increase the risk of tearing

  • Forceps - The use of forceps during delivery increased the risk of third and fourth degree tears

  • Occiput Posterior Position - This is often called a sunny side up baby and means that the back of the baby’s head that is bony is rubbing on mama’s back. If you suspect an OP baby, check out Spinning Babies for exercises and guidance to help

  • Heavy birth weight - “Heavier” babies (over 8.8 lbs) may lead to increased risk of tears. However, it’s important to note that late-term ultrasounds are often not reliable in determining body weight (they can actually be off up to 2lbs) and having a “heavy baby” is linked to the next three risks. (6)

  • Hospital Delivery with OB - Okay, this one is tricky. A few studies have shown that the training an OB receives can actually impact your risk of perineal tears. In fact, one study showed that 31.9% of women with OBs have an intact perineum while 56-61% of women under midwifery care had an intact perineum following birth. Furthermore, 42% of the tears with OBs required suturing while only 35-37% with midwives required repair. (7, 9, 10, 13)

  • Pitocin: Pitocin is the synthetic version of oxytocin, the hormone the body naturally releases during labor that causes the uterus to contract. During an unmedicated labor, oxytocin increases in response to the baby applying pressure to the cervix and the pelvic floor. Oxytocin works with other hormones to help expel the baby. For more information on the effects of pitocin, oxytocin and the lovely hormones of birth, this is an excellent blog by Dr. Sarah Buckley. (7)

  • Epidural: This one has mixed risk in research..it’s a chicken or the egg scenario. The reason is that many women who receive epidurals also have more of the other risk factors. All of these inherently increase the risk of perineal tearing on their own so it is unknown if the epidural is truly a risk for increased perineal tears or if it is the “other things” going on like the use of pitocin, provider comfort, or longer labor. (7, 20, 21)

  • Shoulder Dystocia (when the baby’s shoulder gets stuck inside the pelvis): This is another maybe, maybe not situation. One study highlighted that shoulder dystocia does not increase the risk of tearing but is related to OASIS or obstetrical anal sphincter injury. OASIS often results in anal incontinence, recurring urinary tract infections and pelvic pain. (7, 22)

Is there anything we can do to minimize the risk of perineal tears?

Risk Factors for perineal trauma_-2.png

There are some things we have zero control over like first-time vaginal delivery and birth weight. However, there are other things that we may be able to modify to ideally reduce the risk of tears!

  • Position/Movement: The stereotypical position we see a women giving birth on TV is called the lithotomy position--on her back, feet in straddles, knees up and pushing. Unfortunately the lithotomy position results in the highest rate of tearing. (6,7) There are other birthing positions such as a person being on all-fours or lying on their side, kneeling, standing, squatting or even sitting on a seat (aka the toilet) can actually decrease the risk of tearing! (7, 9, 10)

  • Avoid “Routine Episiotomy”: Per ACOG, data shows no immediate or long-term maternal benefit of routine episiotomy in perineal laceration severity, pelvic floor dysfunction, or pelvic organ prolapse compared with restrictive use of episiotomy. However, if an instrument-assisted delivery is needed, a medio-lateral episiotomy can prevent OASIS. (1,14).

  • Perineal Massage and a warm compress: Perineal massage during pregnancy can be beneficial to help mama prepare mentally and physically for labor. Perineal massage during pregnancy does not have a ton of research to reduce tearing; however, many people have stated they feel more confident and comfortable in their body by doing perineal massage. During the second stage of labor, perineal massage and warm compresses by the provider may reduce 3rd and 4th degree tears.

  • Rest and Be Thankful”: Sheila Kitzinger identified an additional stage of labor she coined, “Rest and be thankful”. This is the stage of labor when the cervix is fully dilated, the baby has descended but contractions may slow or stop. If left alone, these contractions usually reemerge when the mother and baby are both ready for birth. This helps delay the pushing stage of labor and decreases the time, energy and pressure the mother uses during pushing.

  • Slow delivery of infant’s head and instructing mother to not push during delivery of head: These often go hand-in-hand during delivery. The TV stereotypical pushing (coached pushing or purple pushing) is when a laboring mother is told “hold your breath and then push as hard as you can for 10 seconds and do this three times in a row.”  Mothers that are left alone during birth may experience the fetal ejection reflex where they are not instructed to push during delivery but instead naturally breathe or blow the baby out. (4,5,12,16)

  • Birth Team and Support Team: This one is important more because of the other risk factors listed above. Will your provider support you while you move during labor or are there restrictions that require you to lie on your back? Is your provider comfortable with applying warm compresses or performing perineal massage? Does the location you are birthing at or your provider restrict the amount of time you can be fully dilated before pushing? What is your provider’s episiotomy rate? If you were to tear, do you still feel supported by your provider? “ How women are cared for during their labour, birth and postnatal period has a direct impact on how they process, understand and rediscover a new sense of self following severe perineal trauma.” (15)

I wish that everything I listed above was a to-do list you could just check off and everything would be perfect. Unfortunately, life and birth are often full of curveballs. The biggest thing I can recommend is that you find a provider and doula that you trust so if the time comes that you need to transfer locations or divert from your birth preferences, you still feel heard and trust those who are supporting you.

If you want prepare your body and pelvic floor for birth, I would be happy to join you on this journey.


Stay Tuned for Part 3:
How to heal from a perineal tear postpartum


REFERENCES

  1. https://www.ncbi.nlm.nih.gov/pmc/articles/PMC3599825/

  1. Harkin R, Fitzpatrick M, O'Connell PR, O'Herlihy C. Anal sphincter disruption at vaginal delivery: is recurrence predictable? Eur J Obstet Gynecol Reprod Biol. 2003;109:149–152. doi: 10.1016/S0301-2115(03)00008-3.

  2. Obstetric anal sphincter injury: incidence, risk factors, and management. Dudding TC, Vaizey CJ, Kamm MA. Ann Surg. 2008 Feb; 247(2):224-37.

  3. A multicenter interventional program to reduce the incidence of anal sphincter tears. Hals E, Oian P, Pirhonen T, Gissler M, Hjelle S, Nilsen EB, Severinsen AM, Solsletten C, Hartgill T, Pirhonen J. Obstet Gynecol. 2010 Oct; 116(4):901-8.

  4. Decreasing the incidence of anal sphincter tears during delivery. Laine K, Pirhonen T, Rolland R, Pirhonen J. Obstet Gynecol. 2008 May; 111(5):1053-7.

  5. https://www.ncbi.nlm.nih.gov/pubmed/17877679/

  6. https://www.ncbi.nlm.nih.gov/pubmed/27473380

  7. https://www.ncbi.nlm.nih.gov/pubmed/25059967/

  8. https://www.ncbi.nlm.nih.gov/pubmed/11843786/ 

  9. https://www.ncbi.nlm.nih.gov/pubmed/23281859/

  10. .https://www.ncbi.nlm.nih.gov/pubmed/21392242/

  11. https://www.ncbi.nlm.nih.gov/pubmed/28382061 

  12. https://www.ncbi.nlm.nih.gov/pubmed/28198041 

  13. .https://www.ncbi.nlm.nih.gov/pubmed/29537100

  14. https://bmcwomenshealth.biomedcentral.com/articles/10.1186/1472-6874-14-32 

  15. https://www.ncbi.nlm.nih.gov/pubmed/16732773 

  16. Hoyte, L., Damaser, M.S., Warfield, S.K. et al. Quantity and distribution of levator ani stretch during simulated vaginal childbirth. Am J Obstet Gynecol. 2008; 199: 198.e1–198.e5

  17. Lien, K.C., Mooney, B., DeLancey, J.O., and Ashton-Miller, J.A. Levator ani muscle stretch induced by simulated vaginal birth. Obstet Gynecol. 2004; 103: 31–40

  18. https://www.hopkinsmedicine.org/health/treatment-tests-and-therapies/episiotomy 

  19. https://www.jabfm.org/content/16/1/1

  20. https://www.ncbi.nlm.nih.gov/pubmed/24476386 

  21. https://www.ncbi.nlm.nih.gov/pubmed/29629963 

  22. SOGC Guideline: Obstetrical Anal Sphincter Injuries (OASIS): Prevention, Recognition, and Repair 

Perineal Tearing in Labor - Part 1: What is a perineal tear?

The thought of perineal tearing causes shivers to run down most mama’s backs. The perineum is the area between the vaginal opening and the anus that sometimes tears during labor. In fact, 53-79% of women who have a vaginal delivery will have some type of tearing or laceration to the perineum. Depending on where you look, some studies say that as little as 10% of first-time moms will have zero tearing while 31% of second-time mamas will deliver vaginally without tears. (1) Tearing during birth can occur to the perineum, anus (where you have a bowel movement), urethra (where you pee) or other parts of the vulva, including the labia.

“Permission to use copyright image from Pelvic Guru, LLC”

“Permission to use copyright image from Pelvic Guru, LLC”

Perineal Tearing Classification

I think it’s important to understand the different types of tears to better understand what is affected in perineal tears. During normal pregnancy, the pelvic floor muscles can stretch over THREE TIMES their normal length to allow the baby to drop into the pelvis and descend. The collagen matrix which helps support the muscles and tissue also increases by 140%. These natural increases are the body’s way to prepare the pelvic floor for childbirth. Unfortunately, there are times when these changes occur too fast or too slow or the tissue is stretched beyond what it can support and this is when tearing happens.

First-degree tears

First degree tears affect only the skin and no muscles were involved. In general, first degree tears do not require stitches and will heal on their own. In some instances, a small number of stitches may be beneficial.

Second-degree tears

Second degree tears affect both the skin and the muscle of the perineum and generally requires stitches. It often takes ~6-8 weeks for a mother to feel “normal” and/or comfortable again. 

Episiotomy

An episiotomy is a cut made by the provider into the perineum and vaginal wall to make a larger vaginal opening. This is often done to help your baby be born and involves the same muscles and tissue as a 2nd degree tear. However, some episiotomies can extend further than the initial cut and become a 3rd or 4th degree tear. 

Third-degree and fourth-degree tears

3% of first-time moms will have 3rd and 4th degree tears where the tears affects not only the muscle but extends deep into the muscles that control the anus. In moms who have had more than one vaginal delivery, this rate decreases to .8%. (2) These tears are more extensive and often times require stitches and may even require surgical repair. A 4th degree tear actually goes through the anal mucosa (lining of the anus) and the anal sphincter, the muscle that loops around the anal canal and helps to control the release of gas or bowel movements.

Stay tune for Part 2: What we know about why the perineum tears and how to modify risks